For Dan nauke — Science Day at school — I wanted to show something that felt real, not a poster with borrowed diagrams. The idea was simple on paper: build a small hydroponic garden, wire it to a Raspberry Pi, and let software keep the environment stable while plants actually grow.
The result was a full stack project before I had a name for that phrase: PVC channels and a water reservoir on the hardware side, sensors and relays in the middle, and MyCodo on the Pi turning measurements into actions. My fork of the project lives at github.com/andricje/Mycodo.

Why Hydroponics for a School Demo
Hydroponics is a strong Science Day topic because every part of the system is visible. Water circulates instead of sitting in soil. Nutrients arrive in a form plants can use immediately. Temperature, pH, and humidity stop being abstract textbook terms and become numbers on a screen that change when you open the tent or adjust a pump.
The tradeoff is that hydroponics is less forgiving than soil. If the pump stops, roots dry out fast. If pH drifts, uptake changes. If humidity swings, you see it in the leaves before you see it in a grade. That fragility is exactly why automation matters — and why the project was interesting to build, not just to explain.
I followed Kyle Gabriel's Automated Hydroponic System Build as the main reference. It maps cleanly onto what a school project can realistically cover: a modular frame, a recirculating nutrient loop, a control panel on the Pi, and open-source software that already supports the sensors and outputs you need.
Building the Physical Garden
The base system is intentionally low-tech so the automation layer has something worth controlling.
The structure uses PVC downspout channels mounted on a frame, a reservoir bin, and a submersible pump that keeps nutrient solution moving. Seedlings start in rockwool cubes, move into the channels, and grow under a timed light schedule. None of that requires a computer — which was the point. You can explain the biology and the plumbing first, then introduce the Pi as the part that watches and reacts.
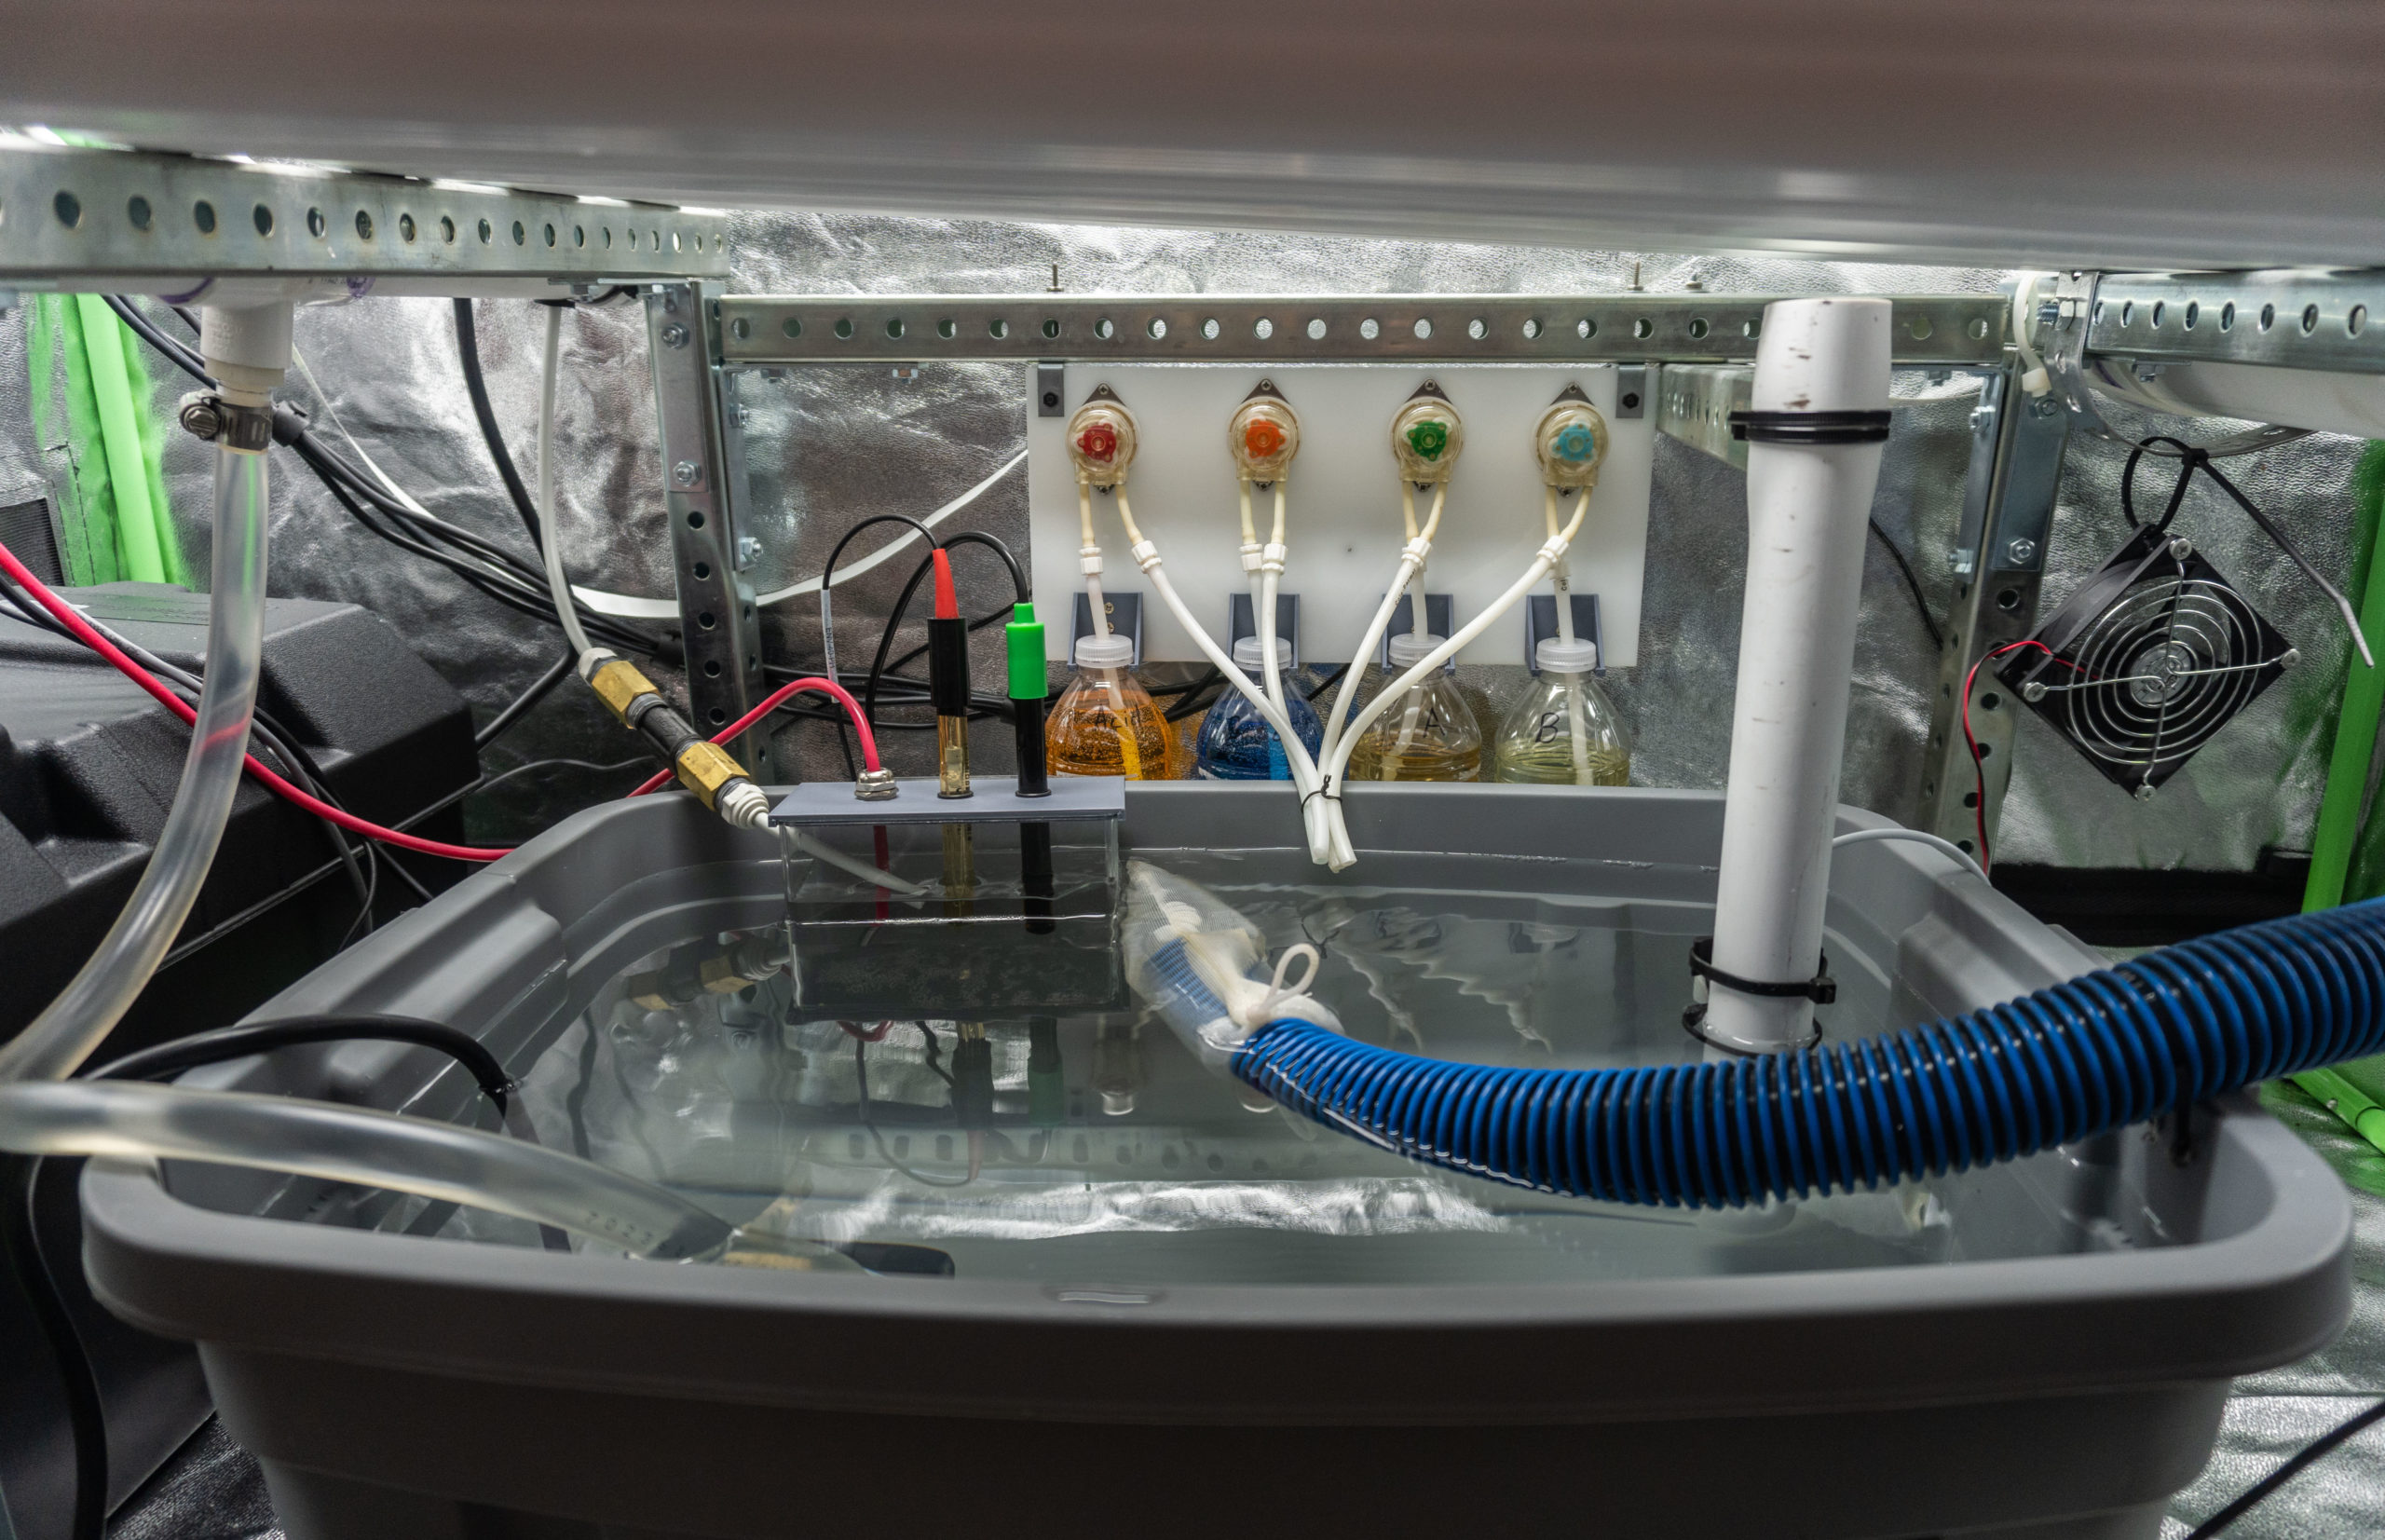
For Science Day, that separation helped. Visitors could follow water from the reservoir through the pump into the channels and back again without needing to understand GPIO pins. The computer came second, as the thing that removes constant manual checking from the loop.

The Hardware Stack
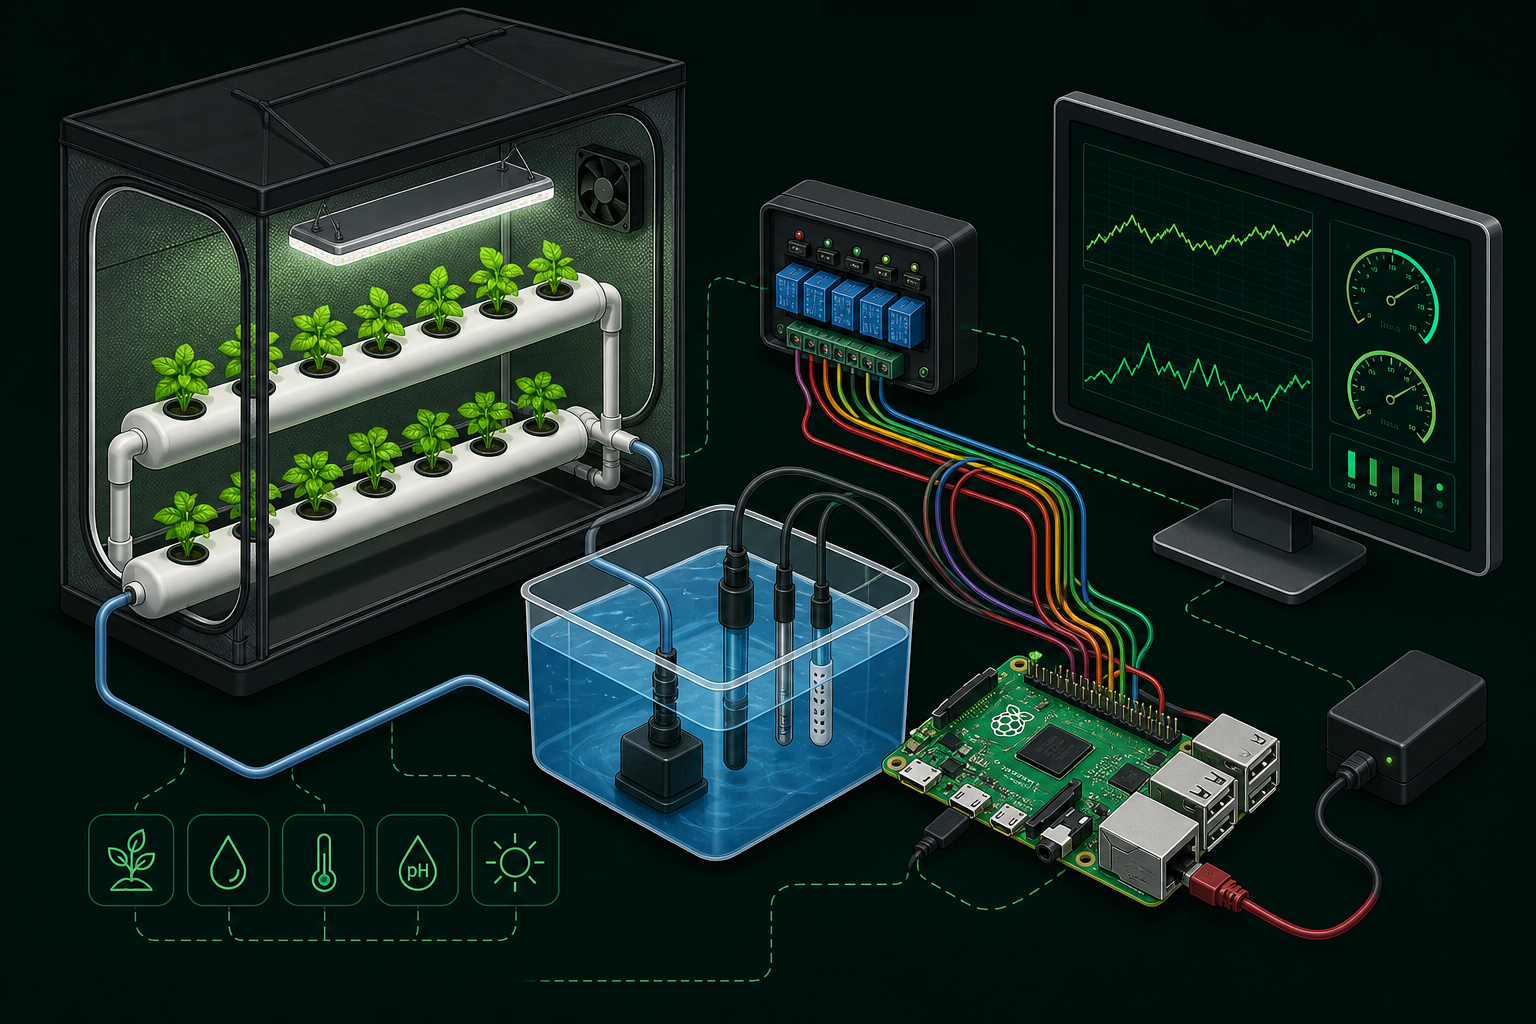
At the center is a Raspberry Pi — in my build, a Pi 4 — running Raspberry Pi OS and talking to the world through GPIO and I2C.
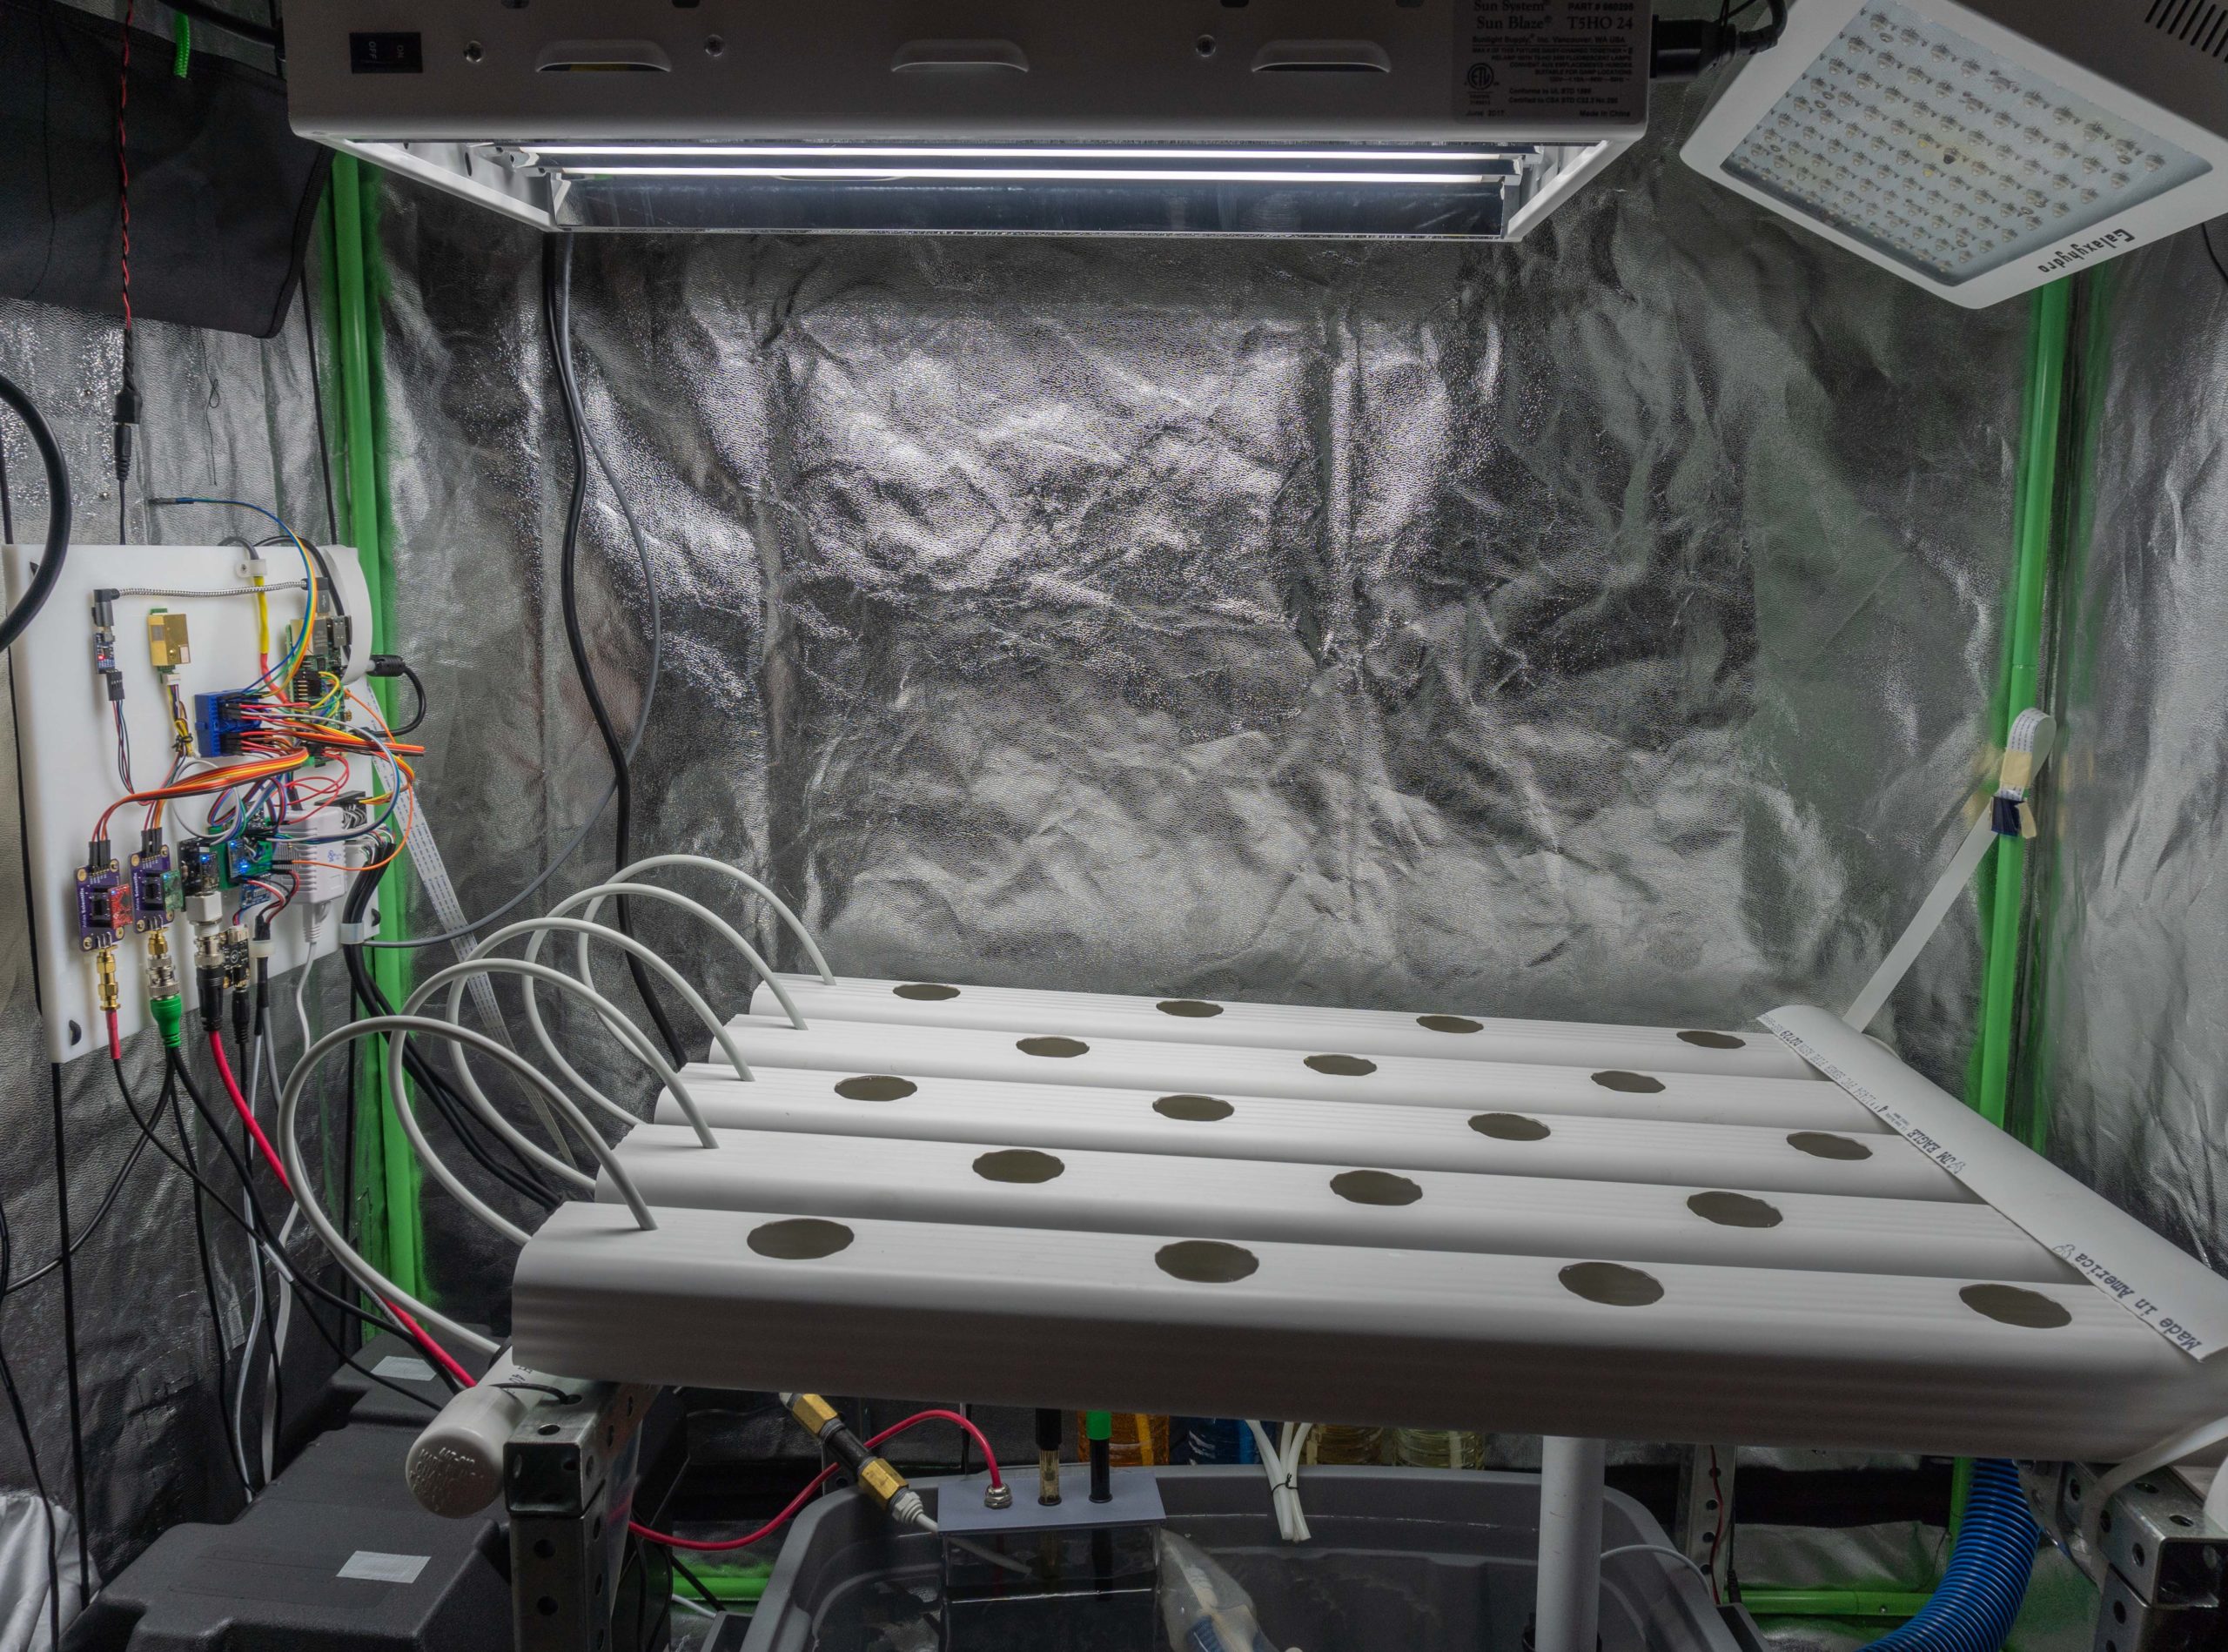
On the input side, the system measures what actually matters for plant health:
- Water chemistry — pH, electrical conductivity (EC), and temperature
- Air conditions — temperature, humidity, and derived values like vapor pressure deficit (VPD)
- Operational safety — water level and flow, so a stuck pump or low reservoir triggers an alert instead of silent crop damage
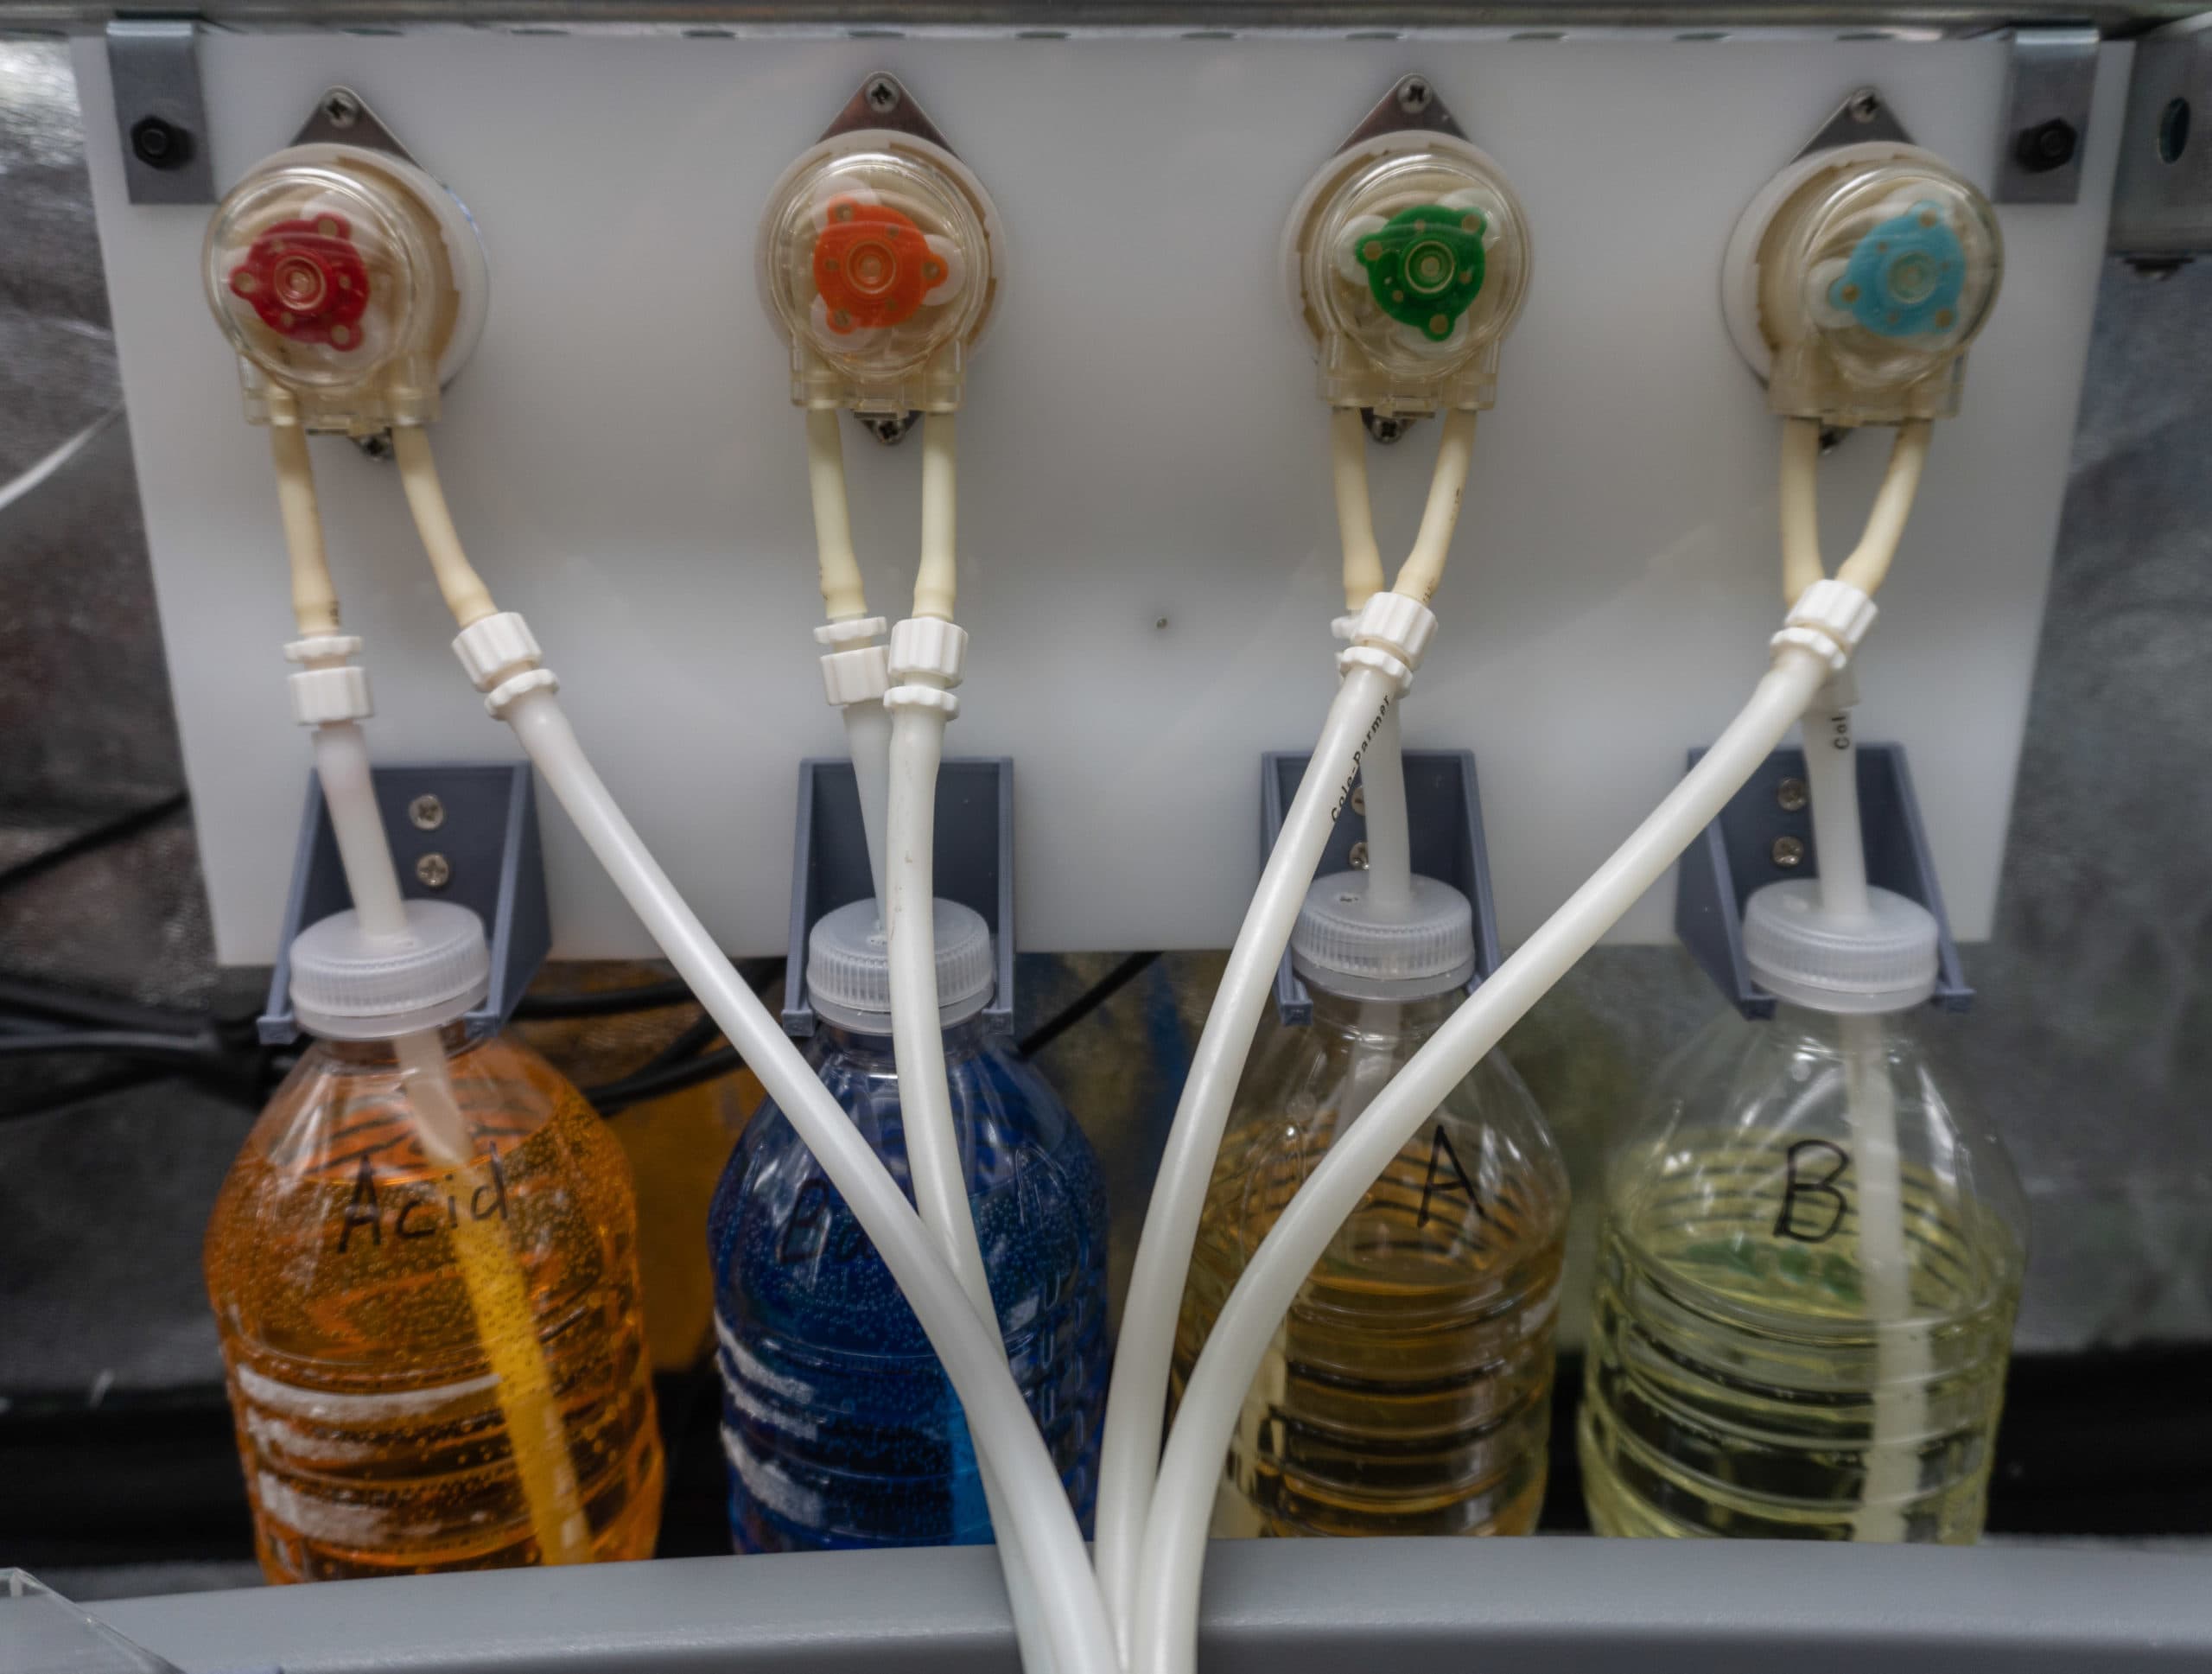
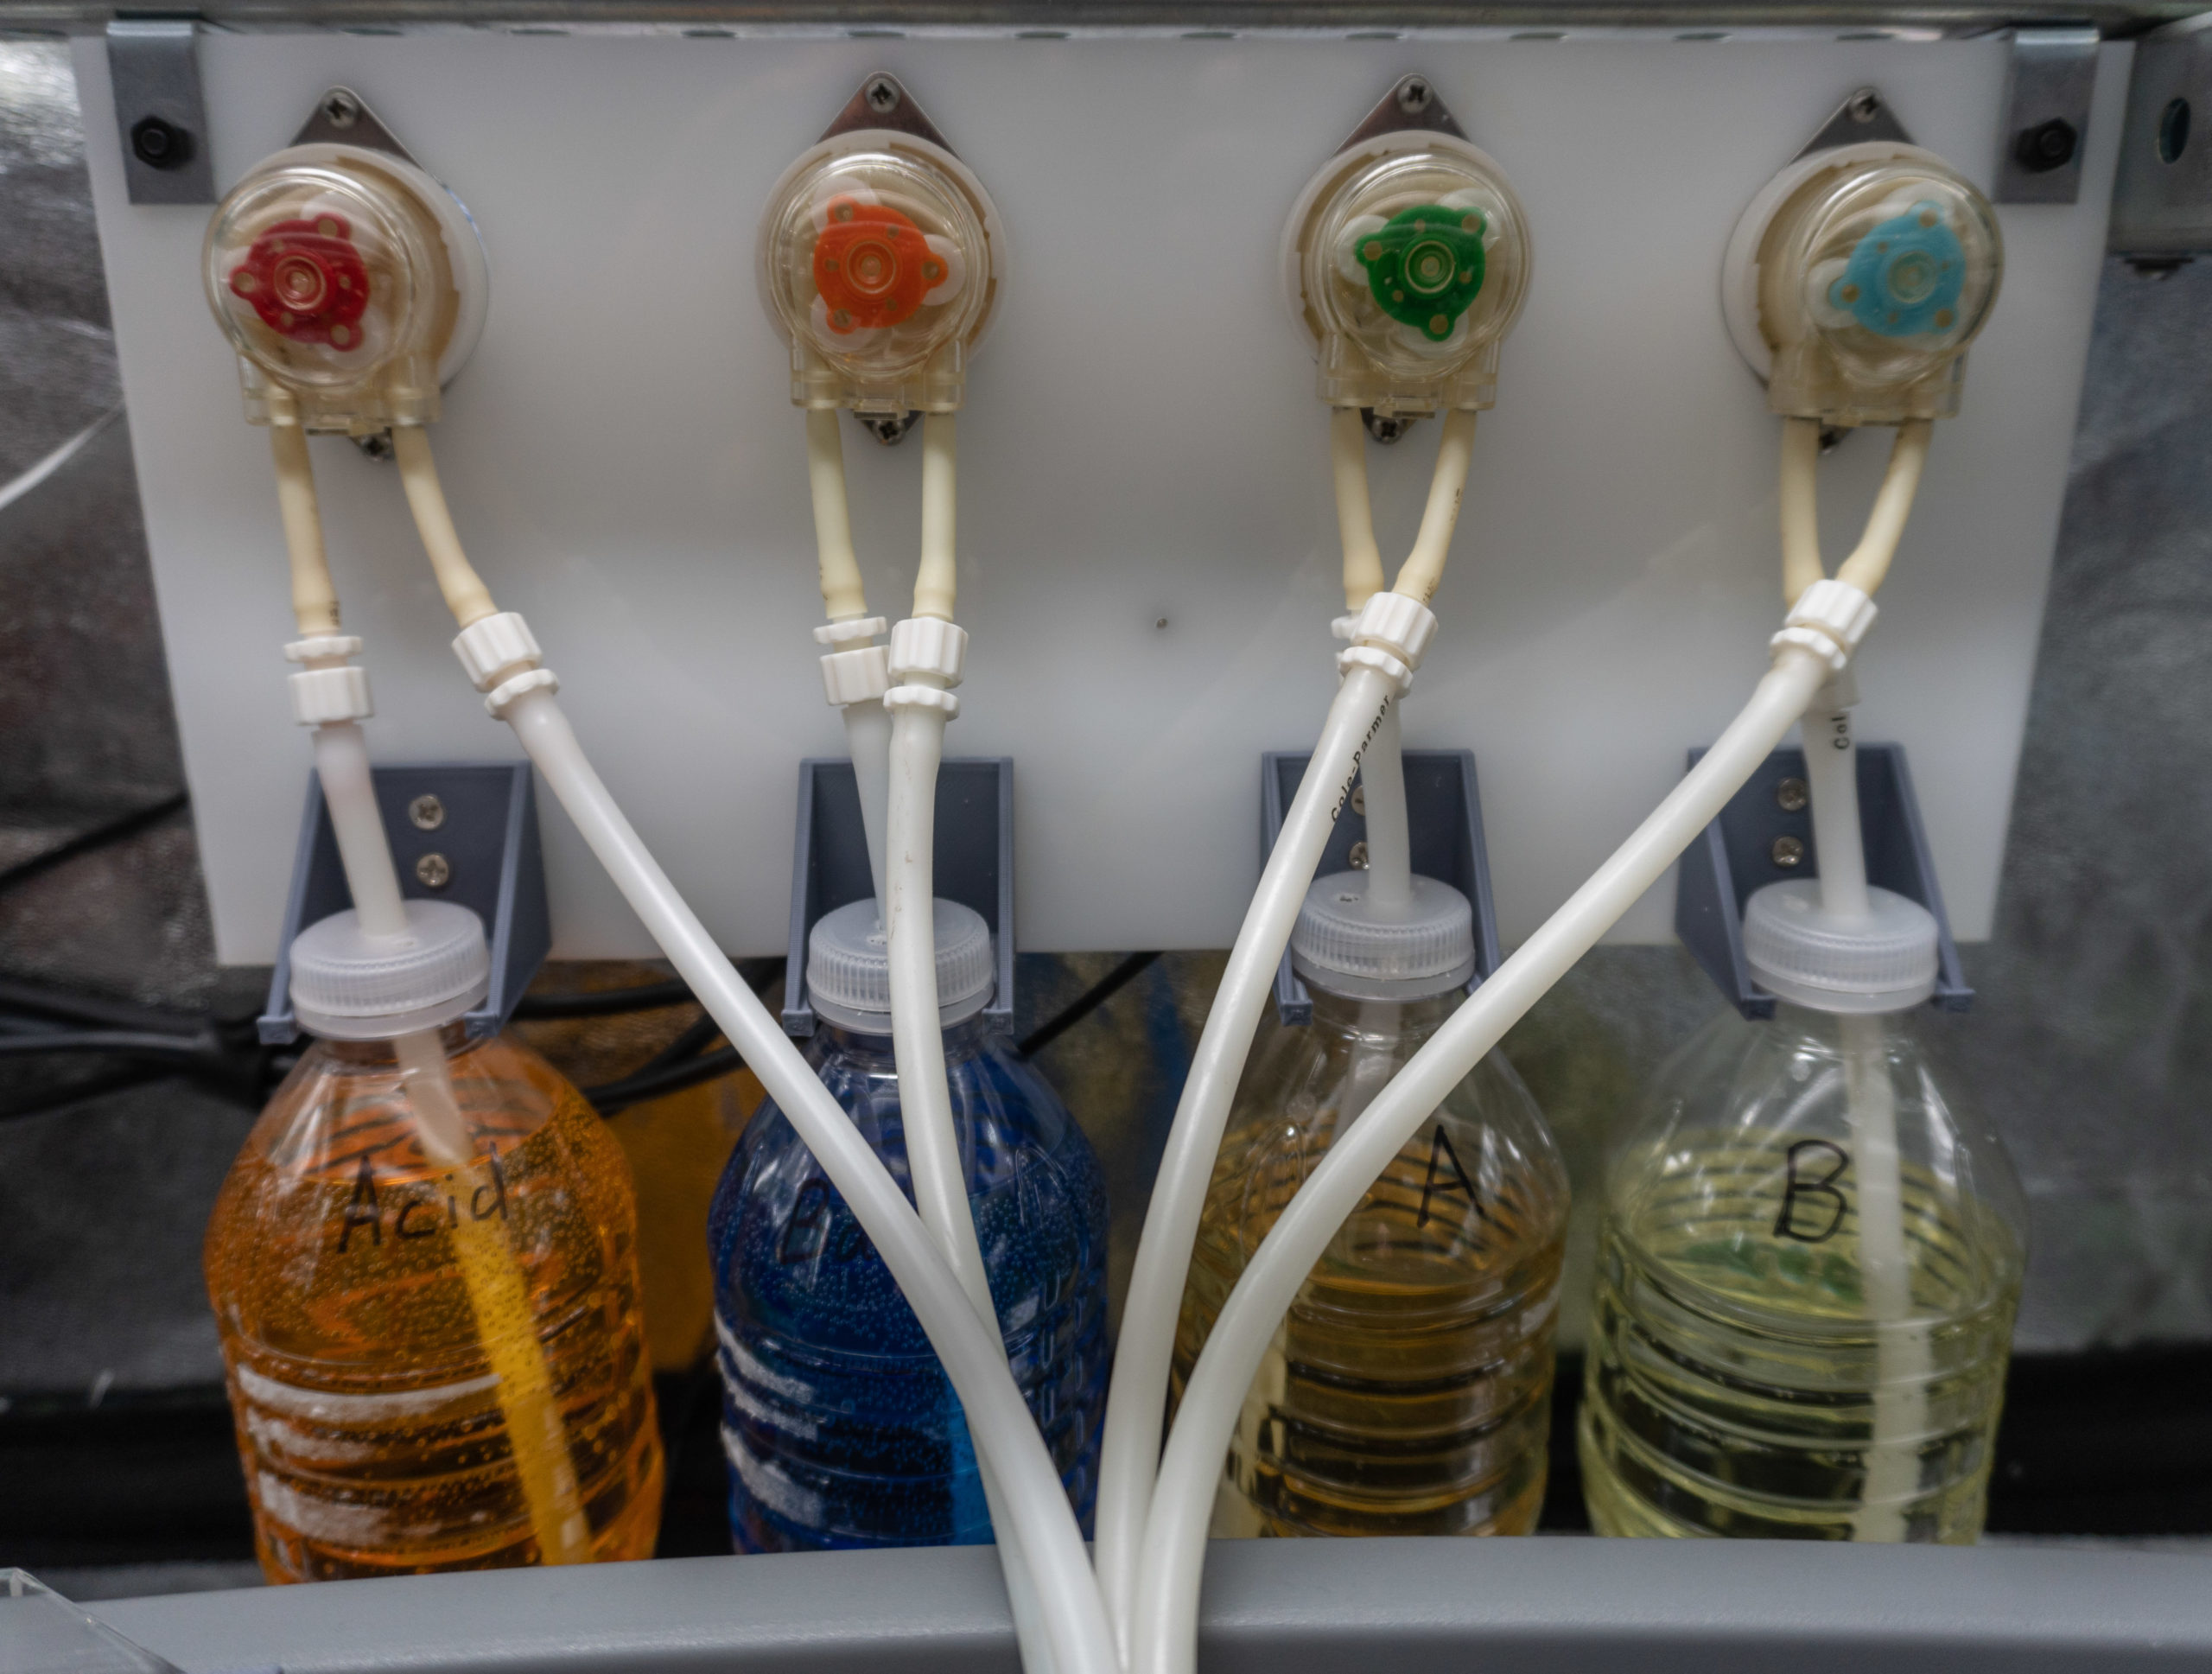
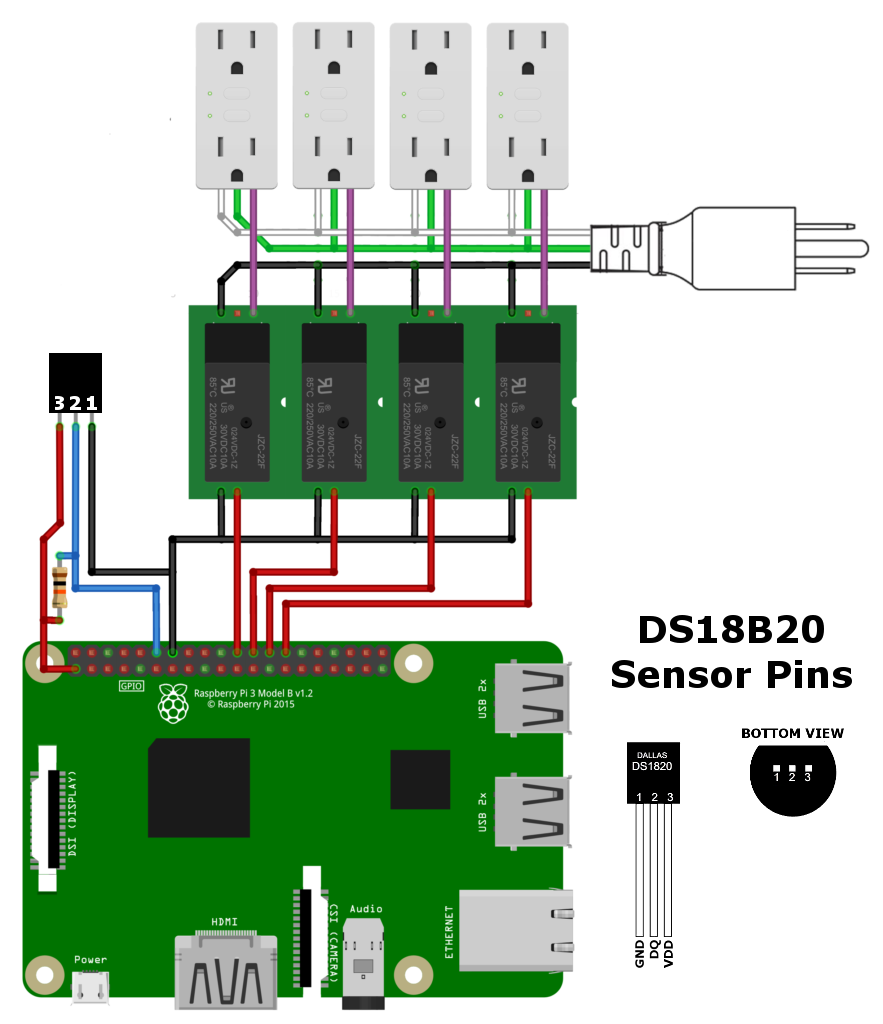
On the output side, relays switch mains-powered devices (grow lights, exhaust fan, humidifier), and peristaltic pumps dose small volumes of acid, base, and nutrient solutions into the reservoir. The Pi does not move water directly; it decides when the pumps and relays should act.
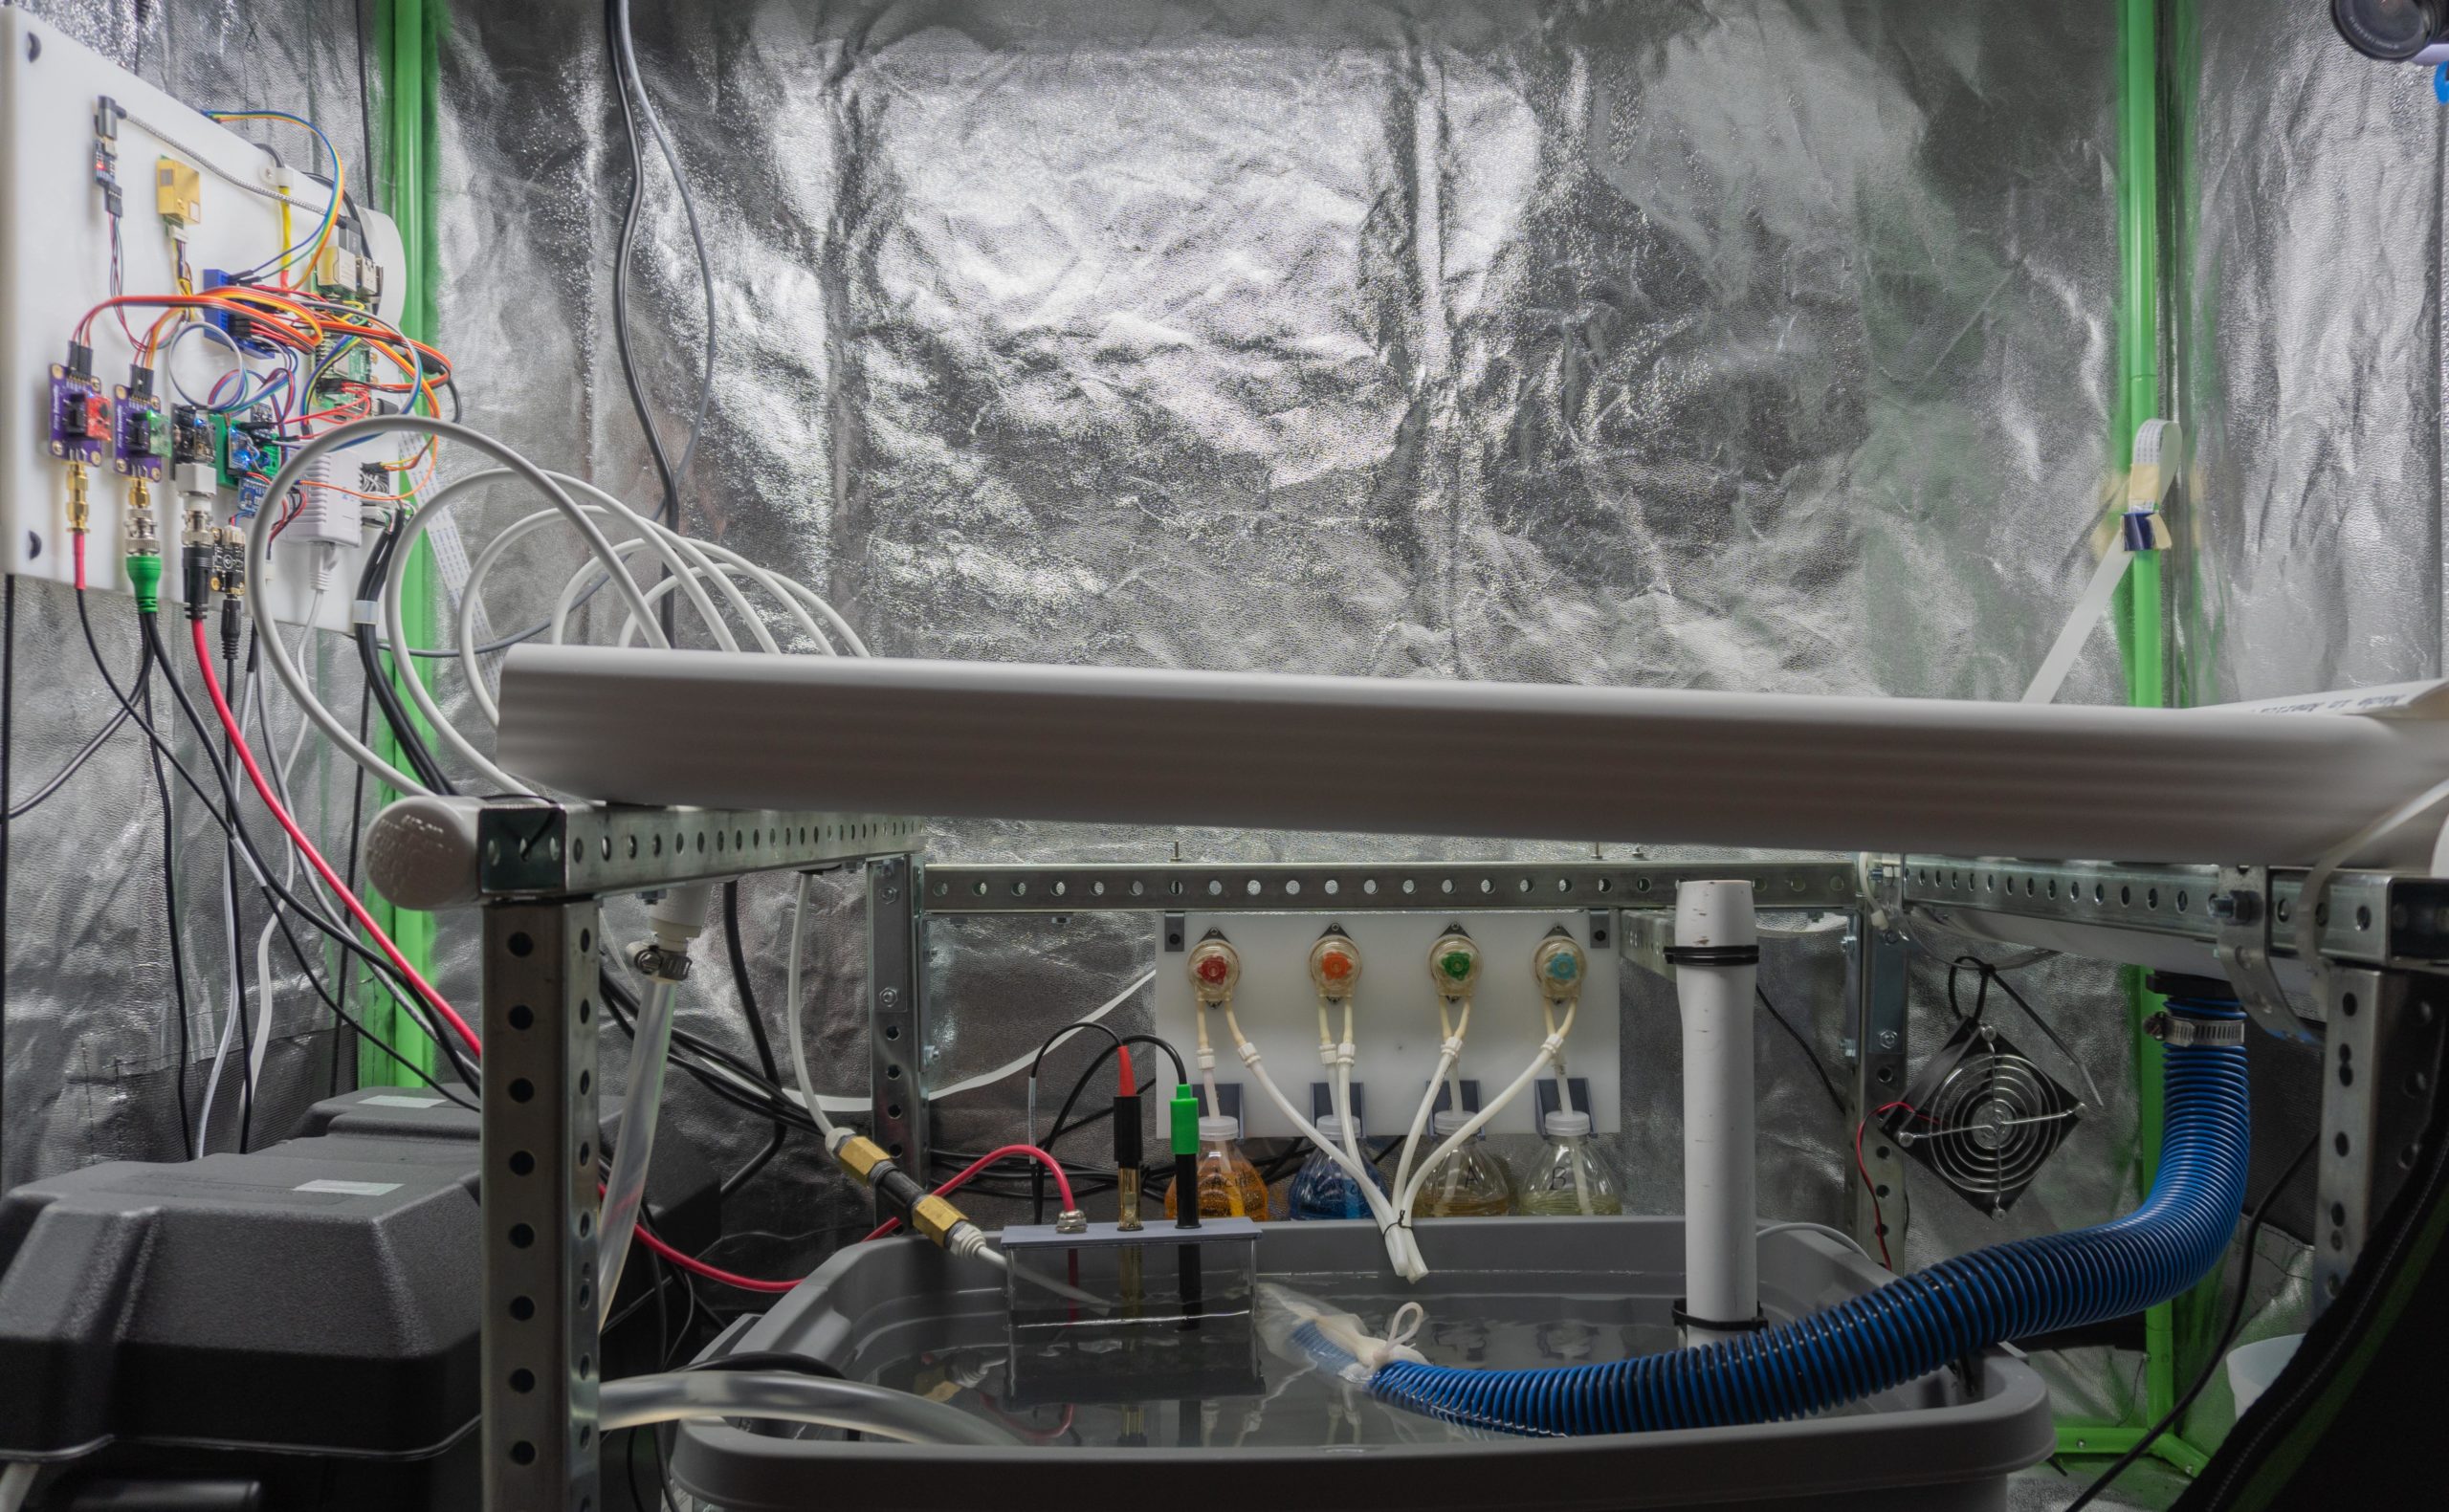
The relay wiring follows the standard pattern documented in the MyCodo materials — Pi GPIO pins drive relay modules, which switch outlets in a sealed control box. Keeping mains voltage inside the box and low-voltage sensing outside it is non-negotiable when the demo has to survive a full day of students walking past it.
MyCodo as the Brain
MyCodo is open-source environmental regulation software for the Raspberry Pi. Install is a single command:
curl -L https://kizniche.github.io/Mycodo/install | bashAfter installation, the web interface runs on the Pi's local address. From there you configure Inputs (sensors), Outputs (relays, pumps), and Functions that connect them — timers, PID controllers, conditional triggers, and alerts.

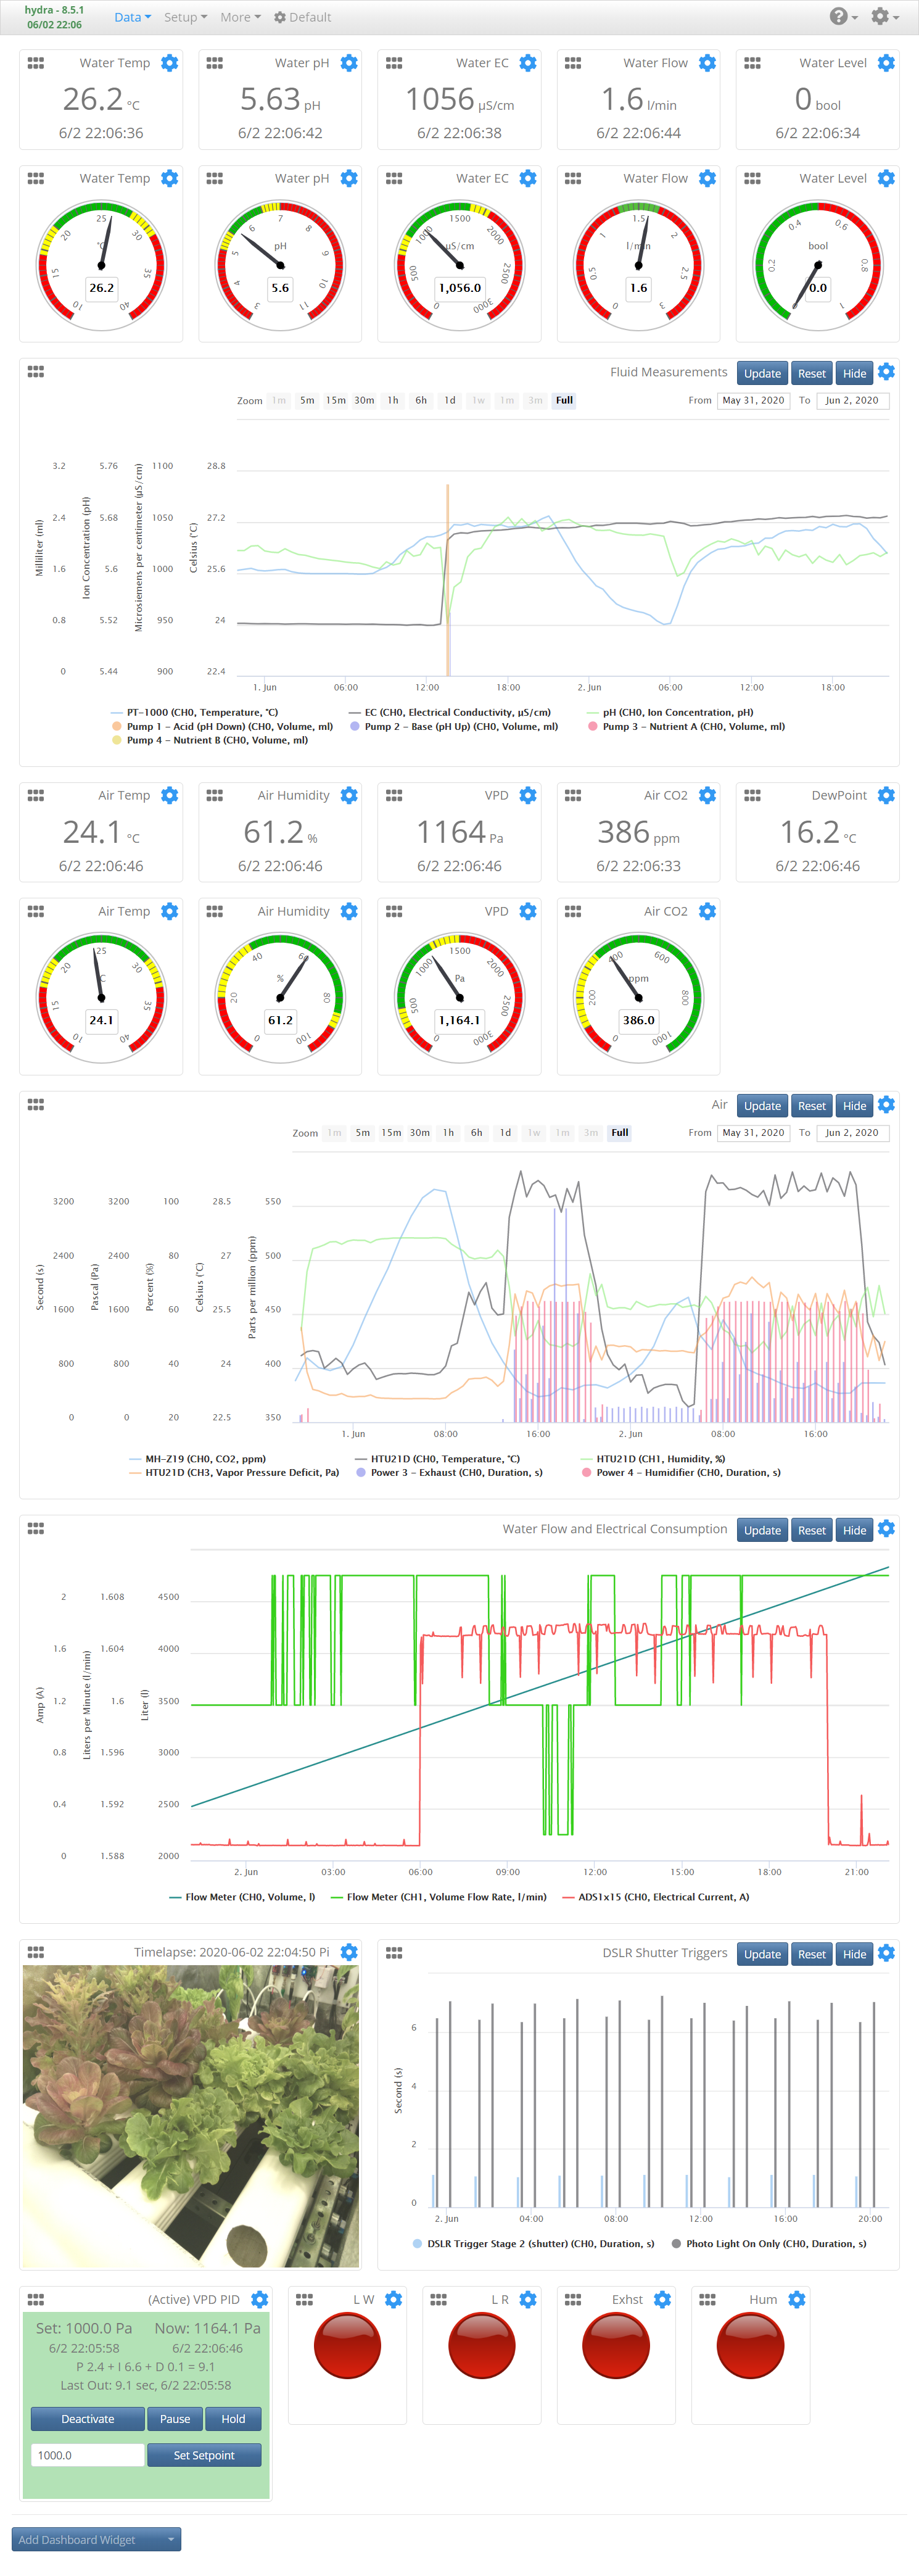
For the garden, the automation broke down into a few concrete jobs:
Grow light schedule
A timer turns lights on and off on a fixed daily window. Simple, but it establishes the rhythm the whole system follows.
pH and EC regulation
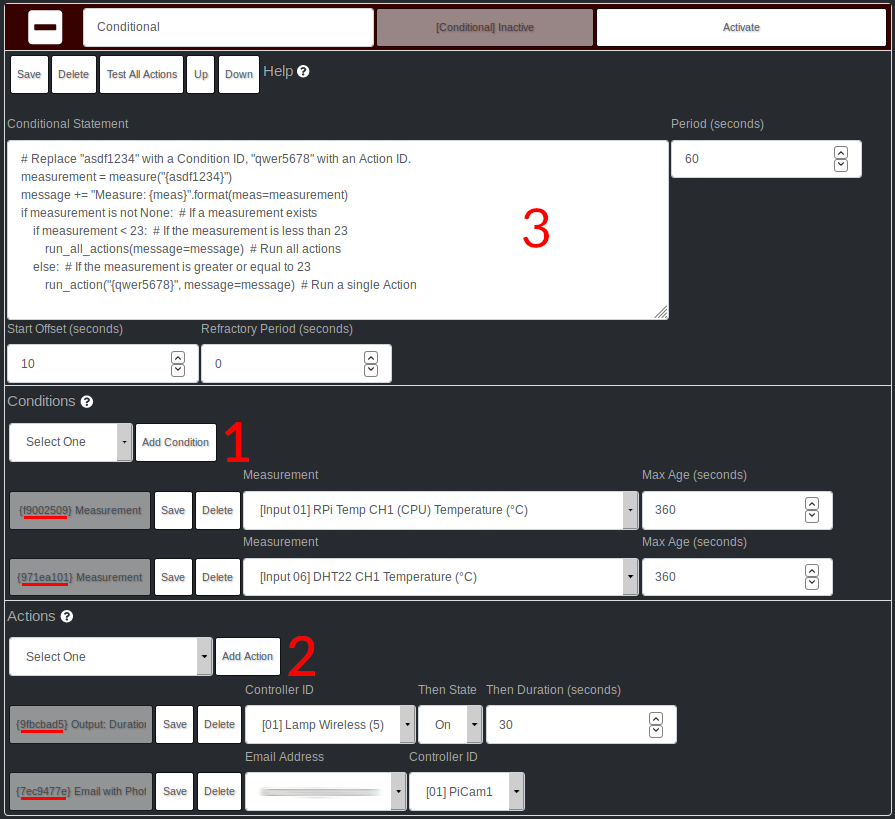
Water chemistry drifts as plants feed and water evaporates. MyCodo's conditional controllers compare live pH and EC readings against target ranges and pulse the peristaltic pumps when values fall outside bounds — acid or base for pH, A/B nutrients for EC. The logic is visible in the UI, which made it easy to show on Science Day without opening Python files.

VPD and climate
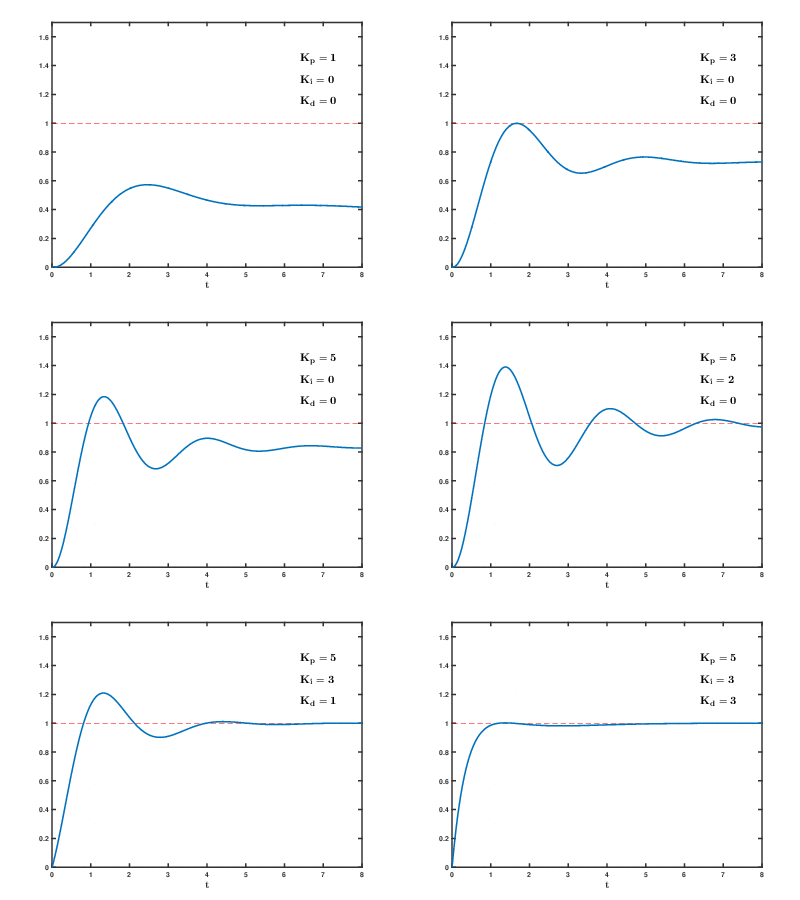
Vapor pressure deficit combines temperature and humidity into one number that describes how hard the air pulls moisture from leaves. MyCodo can regulate VPD with a PID controller driving a humidifier and exhaust fan — the same control pattern used in professional grow environments, scaled down to a school tent.
Alerts
Email notifications fire when measurements cross thresholds — air temperature too high, water level too low, flow stopped. For a demo that runs unattended between classes, that layer of safety matters as much as the graphs.
What Science Day Actually Looked Like
The booth had two layers of story.

First, the physical garden: water moving, roots visible in the channels, a clear path from reservoir to plant. Second, a screen with the MyCodo dashboard — live graphs, gauge widgets, relay states, and the camera feed if you add a Pi Camera module.
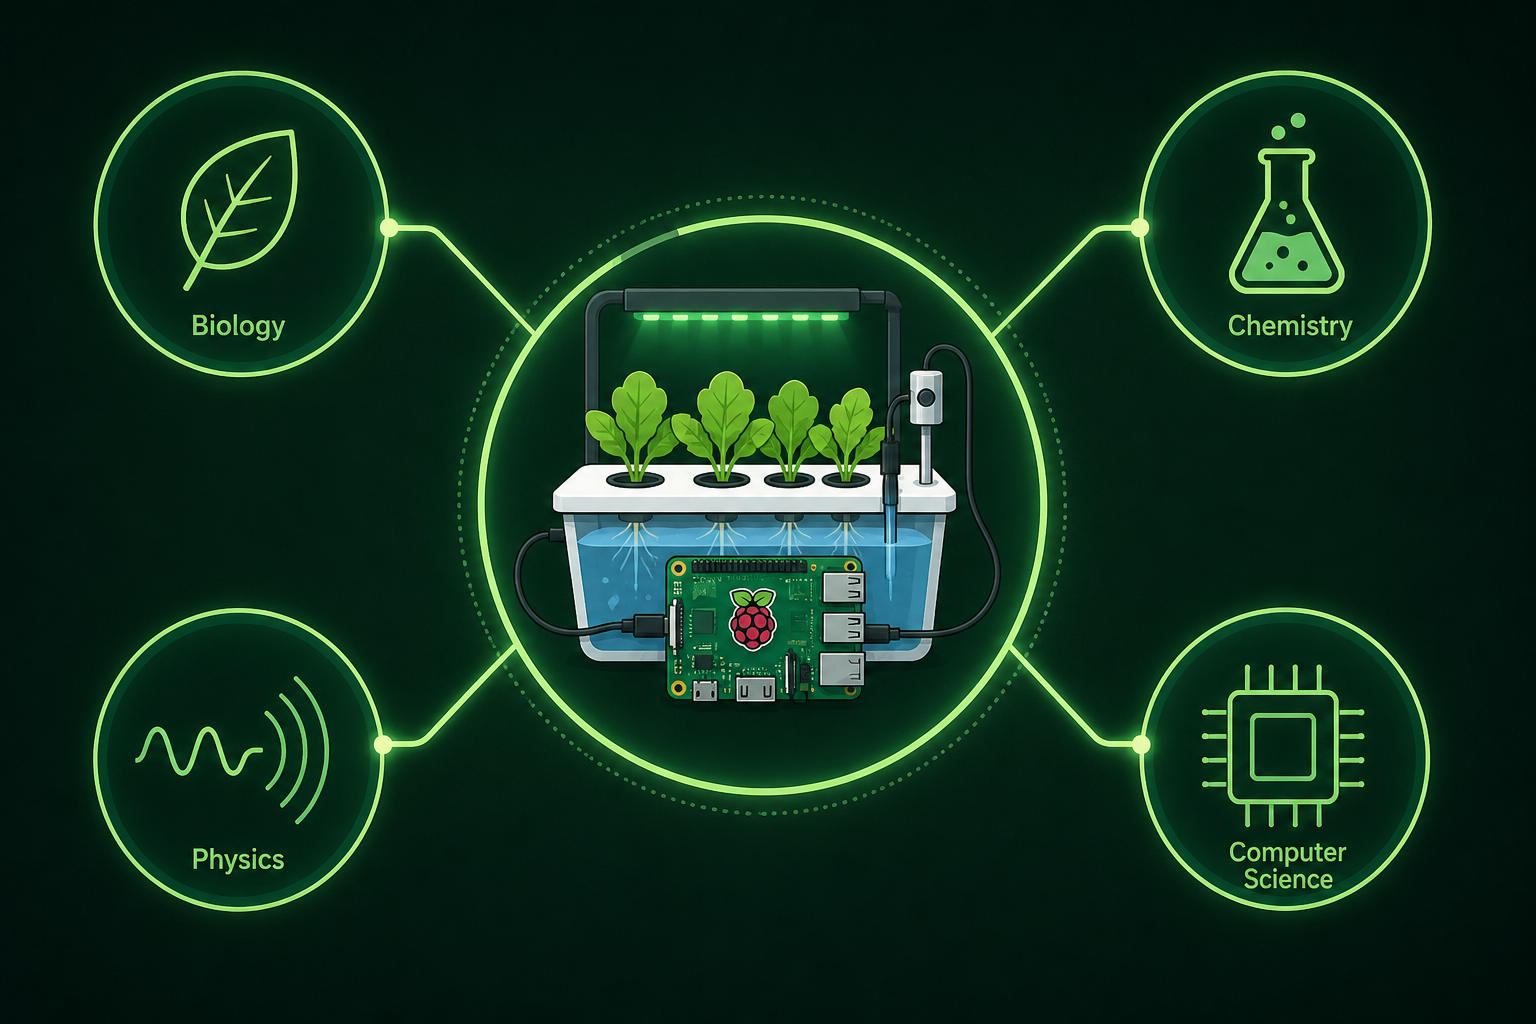
That combination lands differently than either half alone. The hardware proves you built something. The dashboard proves it is measured, regulated, and reproducible. Teachers asked about curriculum links (biology, chemistry, physics, computer science). Students asked whether they could grow strawberries.
Neither question is off-topic. The project sits at the intersection of plant science, fluid systems, electronics, and software — which is exactly what Dan nauke is supposed to surface.
What I Took From It
This was one of the first times I built a complete loop: design the physical system, wire the sensors, configure the automation, and stand next to it while it ran in public. A few things stuck:
- Start with a manual baseline. If you cannot grow plants without the Pi, you will not debug well when the Pi is wrong.
- Prefer boring, documented parts. Atlas Scientific sensors, standard relay modules, and MyCodo's built-in device support beat custom drivers the week before the fair.
- Make the UI part of the demo. MyCodo's dashboards are not an afterthought — they are how you explain PID and pH to someone in ninety seconds.
- Open source accelerates learning. I did not write an automation platform from scratch for a school deadline. I forked mature software, configured it for my hardware, and spent the saved time on wiring and calibration.
The fork at github.com/andricje/Mycodo tracks the project as I used it. The upstream project, documentation, and hydroponic build guide remain the best starting point if you want to build your own.
If You Want to Build One
You do not need the full industrial setup on day one. A minimal path looks like this:
- Build a small recirculating hydroponic loop (channels, reservoir, pump).
- Flash Raspberry Pi OS and install MyCodo.
- Add one water sensor (pH or EC) and one output (a relay on the grow light).
- Configure a timer and one conditional controller in the web UI.
- Expand sensors and pumps once the first loop is stable.
Science Day taught me that the impressive part is not any single component — it is that the whole chain works together: water, nutrients, sensors, relays, graphs, and plants that are still alive when the bell rings.